StoreKit / setting up and testing subscriptions
Introduction
StoreKit is Apple’s native framework for managing in-app purchases, including auto-renewable subscriptions.
This MOP covers the complete process of setting up and integrating subscriptions into an iOS app. It walks through the configuration in App Store Connect, all necessary project setup, and includes concrete code examples for fetching and handling subscriptions using StoreKit API.
While StoreKit supports various product types, this document focuses specifically on auto-renewable subscriptions, as they are the most common model for monetizing content or services in modern apps.
This MOP will cover:
- Creating subscription products and groups in App Store Connect
- Fetching products using
Product.products(for:) - Handling purchase flow and subscription status
- Listening to updates using
Transaction.updates - Notes on testing and sandbox environment
Subscription setup
Before you implement any code, go to App Store Connect to create subscription products and add their metadata. You should have an app record created, with proper signing set up in Xcode, and a developer account in good standing before proceeding.
When ready, navigate to Subscriptions in your App Store Connect page of your app, and create a new Subscription Group.
See images below.
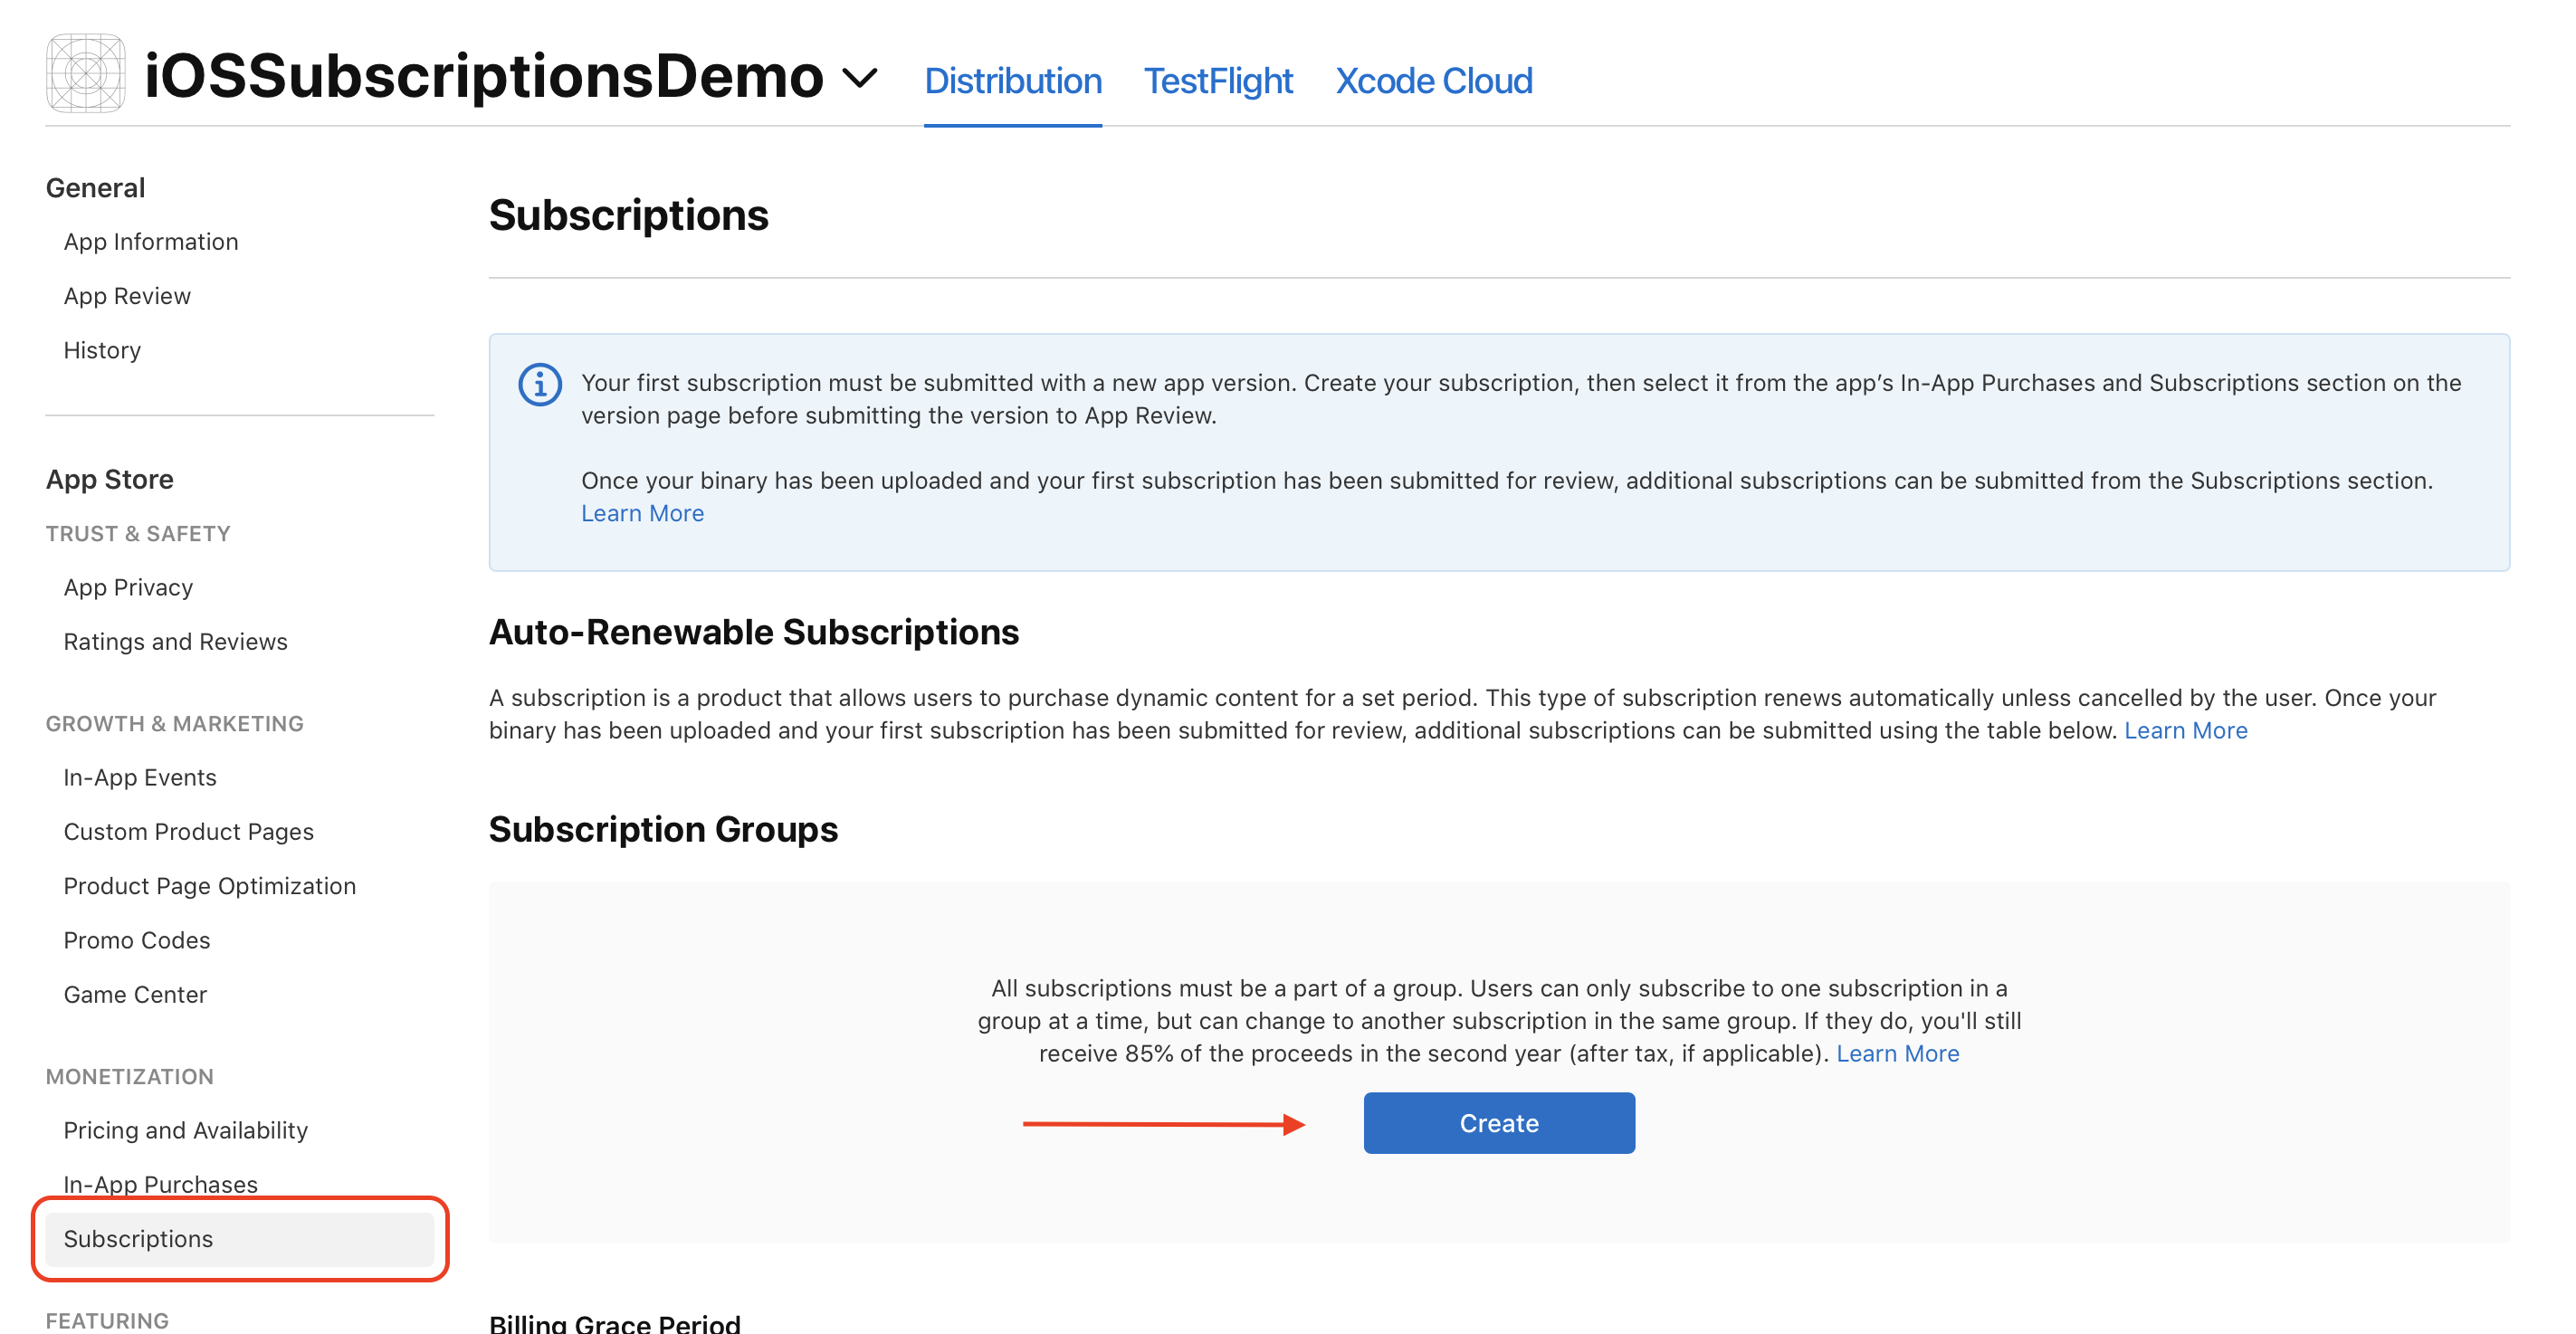
Image 1. Creating a subscription group.
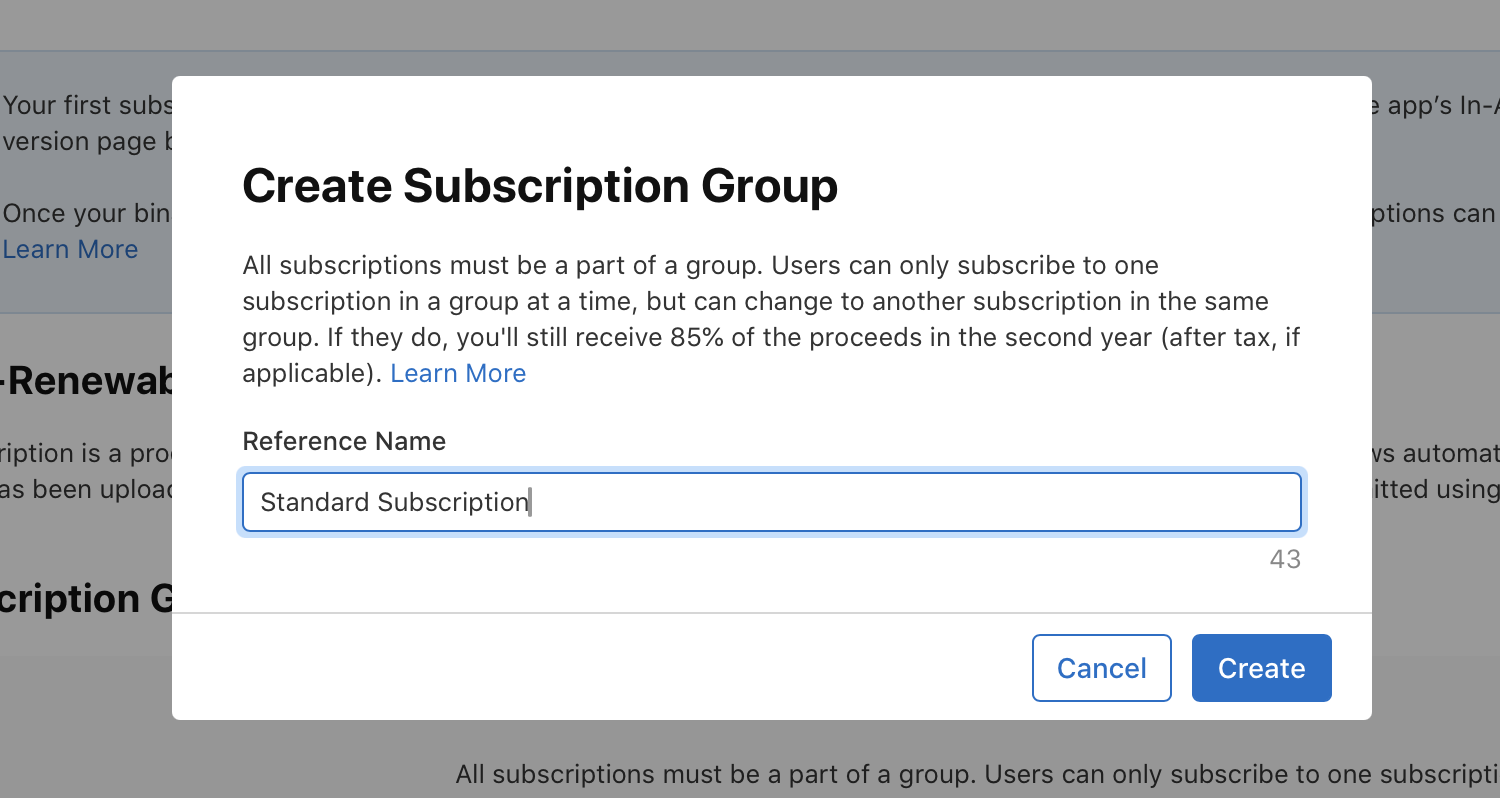
Image 2. Naming a subscription group.
Subscription group rules:
- Users can only subscribe to one product within a group at a time
- Users can upgrade, downgrade or change subscriptions in the same group
- Users can subscribe to more than one subscription at the same time but only if they are in separate groups
After creating a subscription group, the next step is to create a subscription itself.
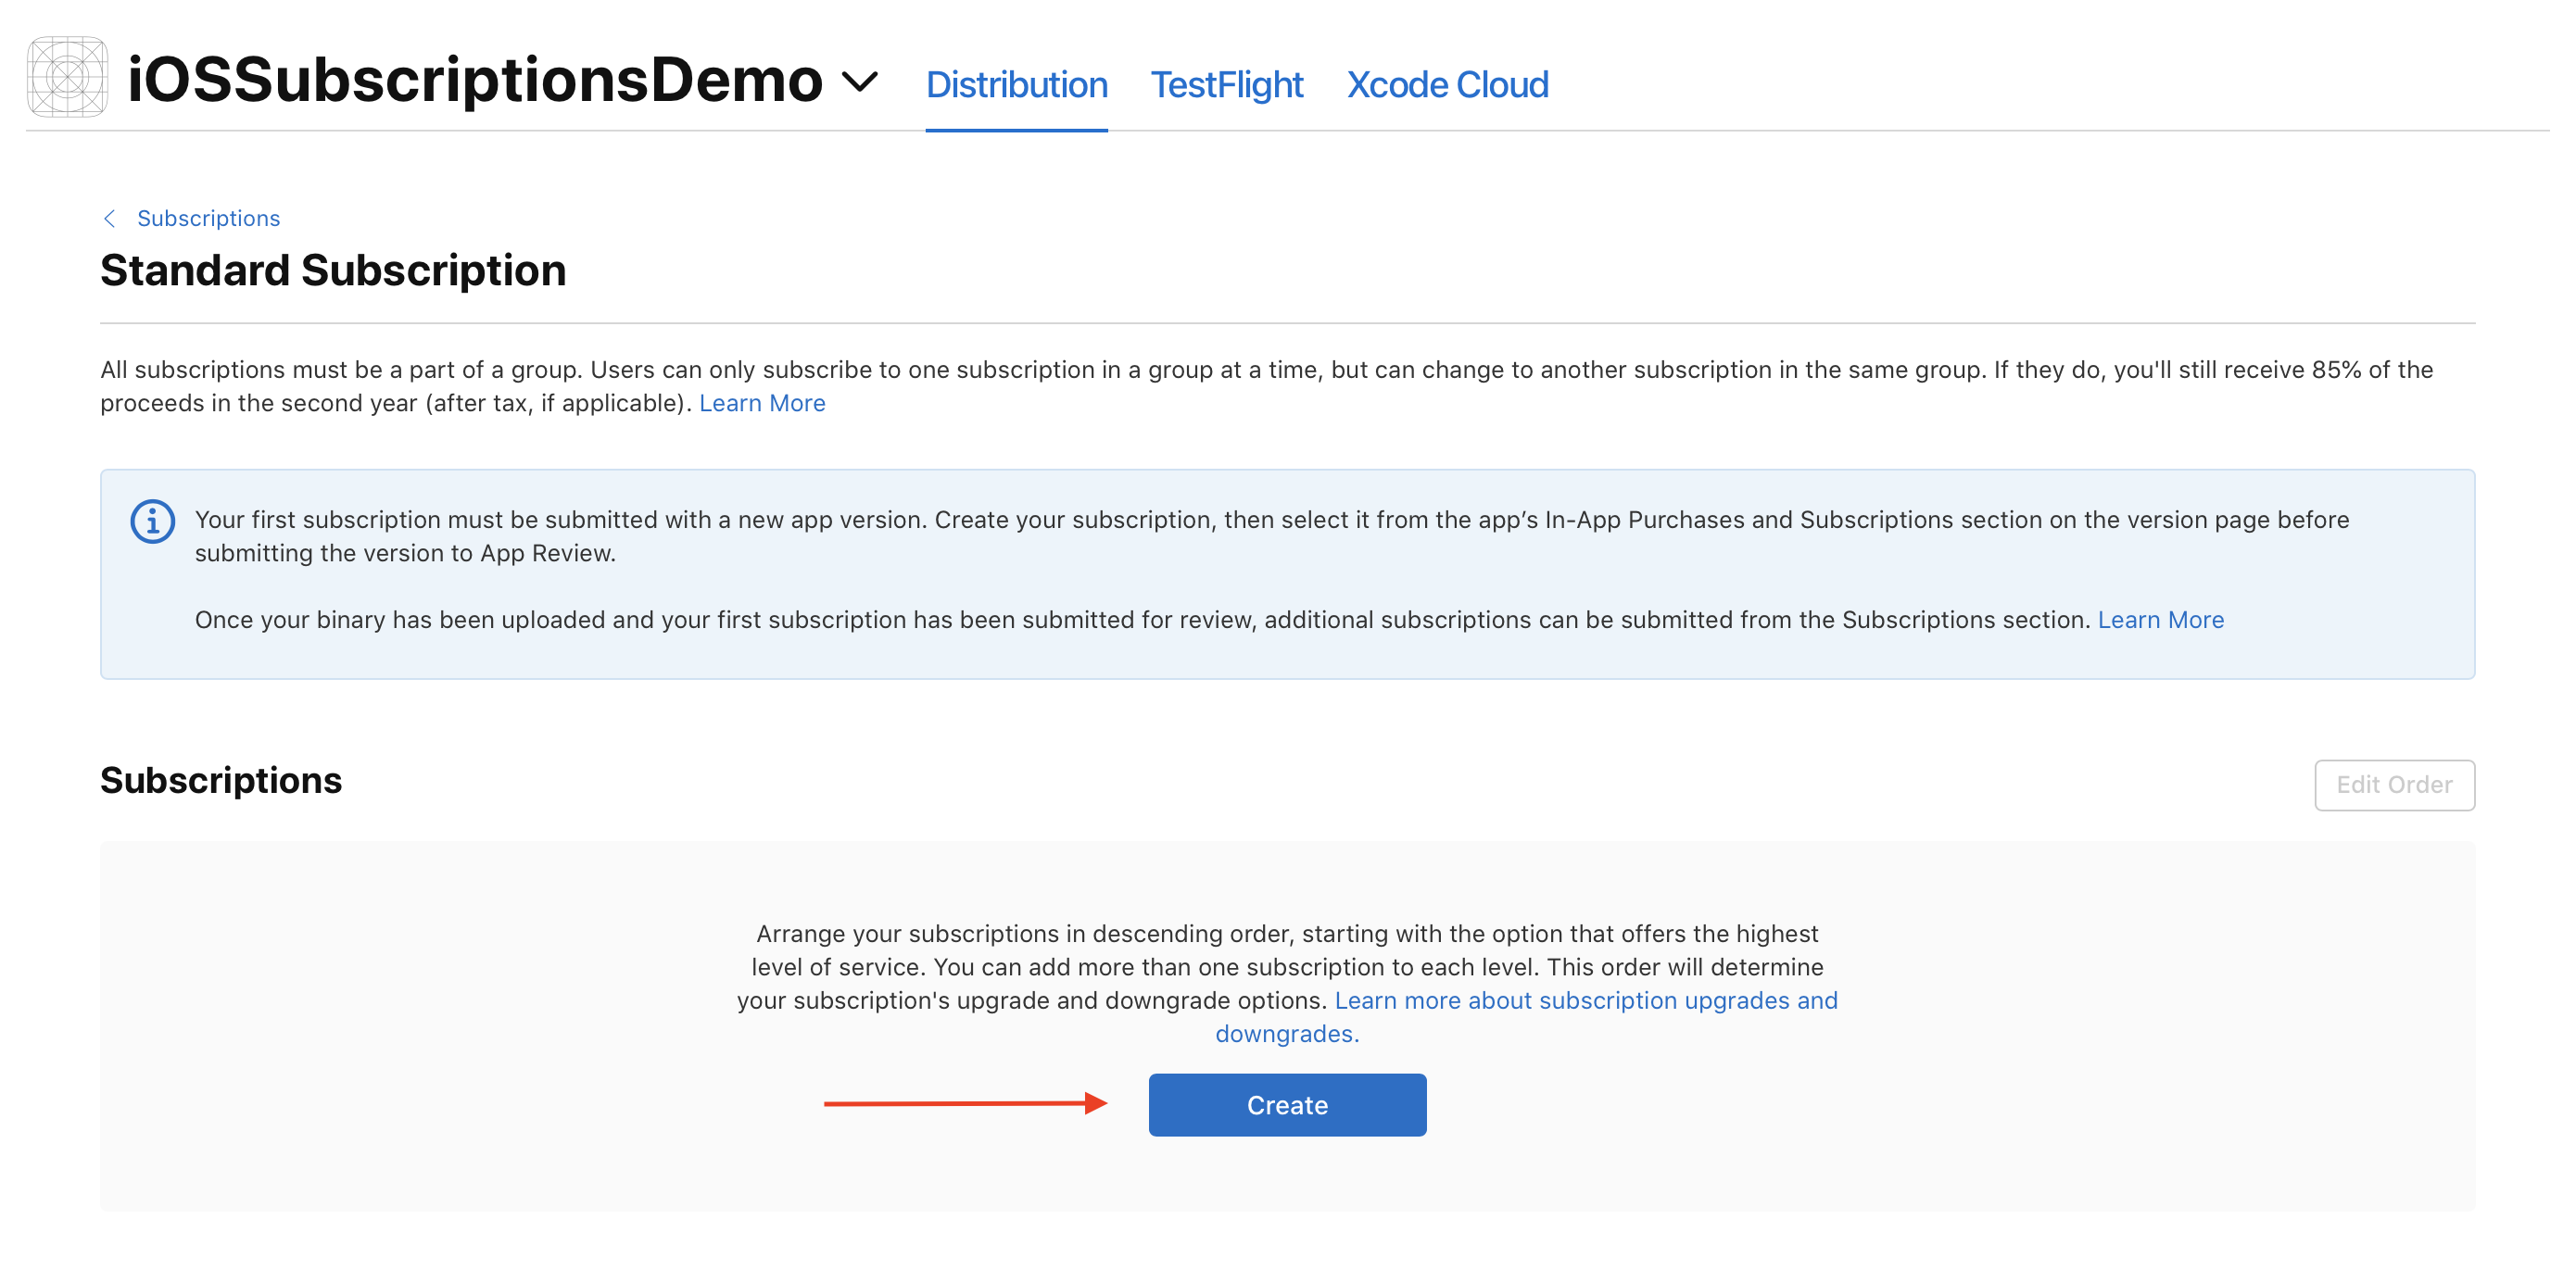
Image 3. Create a subscription.
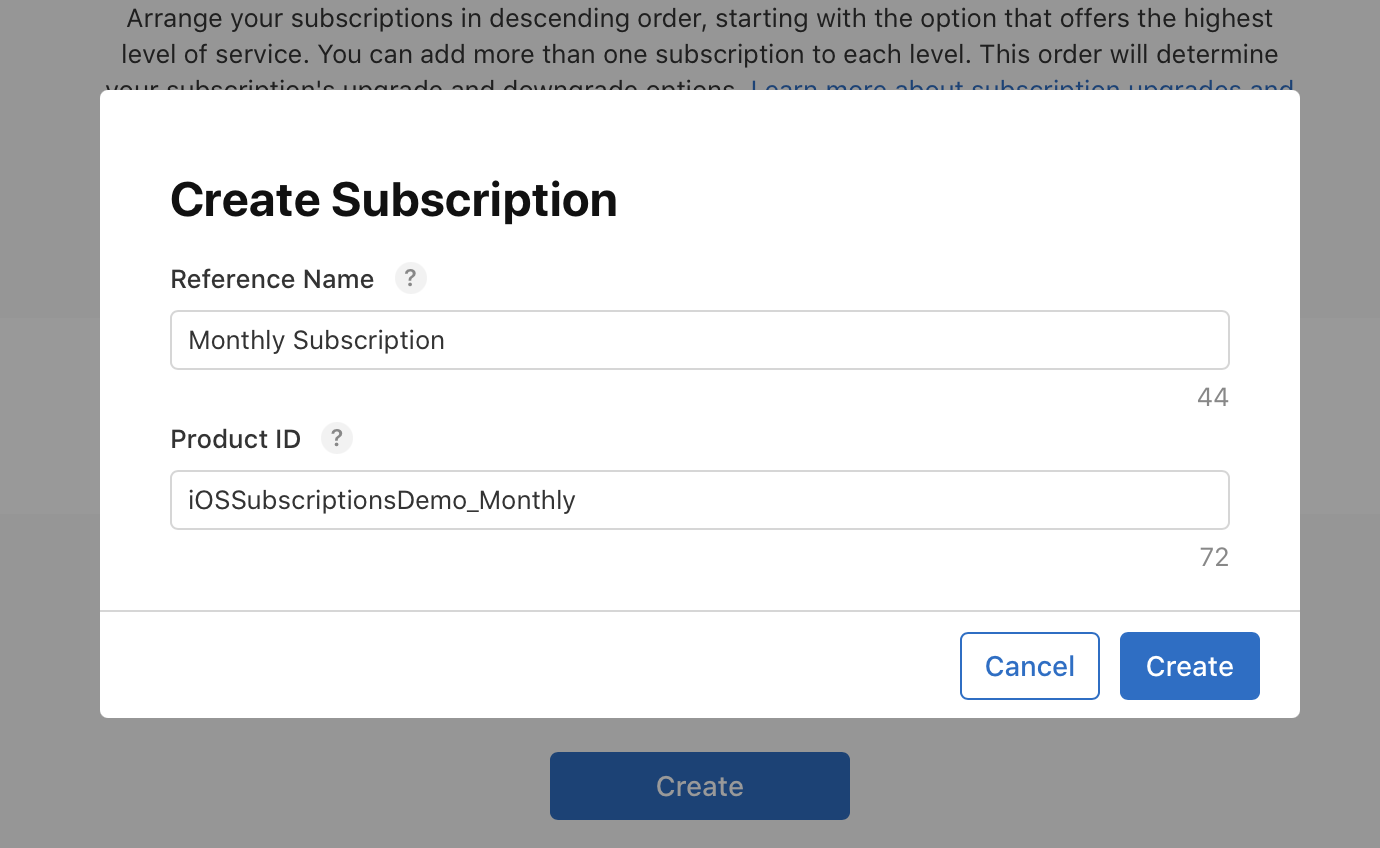
Image 4. Name a subscription.
Use a descriptive reference name (seen in the dashboard and in App Store Connect reporting) and make sure to pick a unique product ID. You will reference this in code later. After this, make sure to fill in all the subscription metadata on this page:
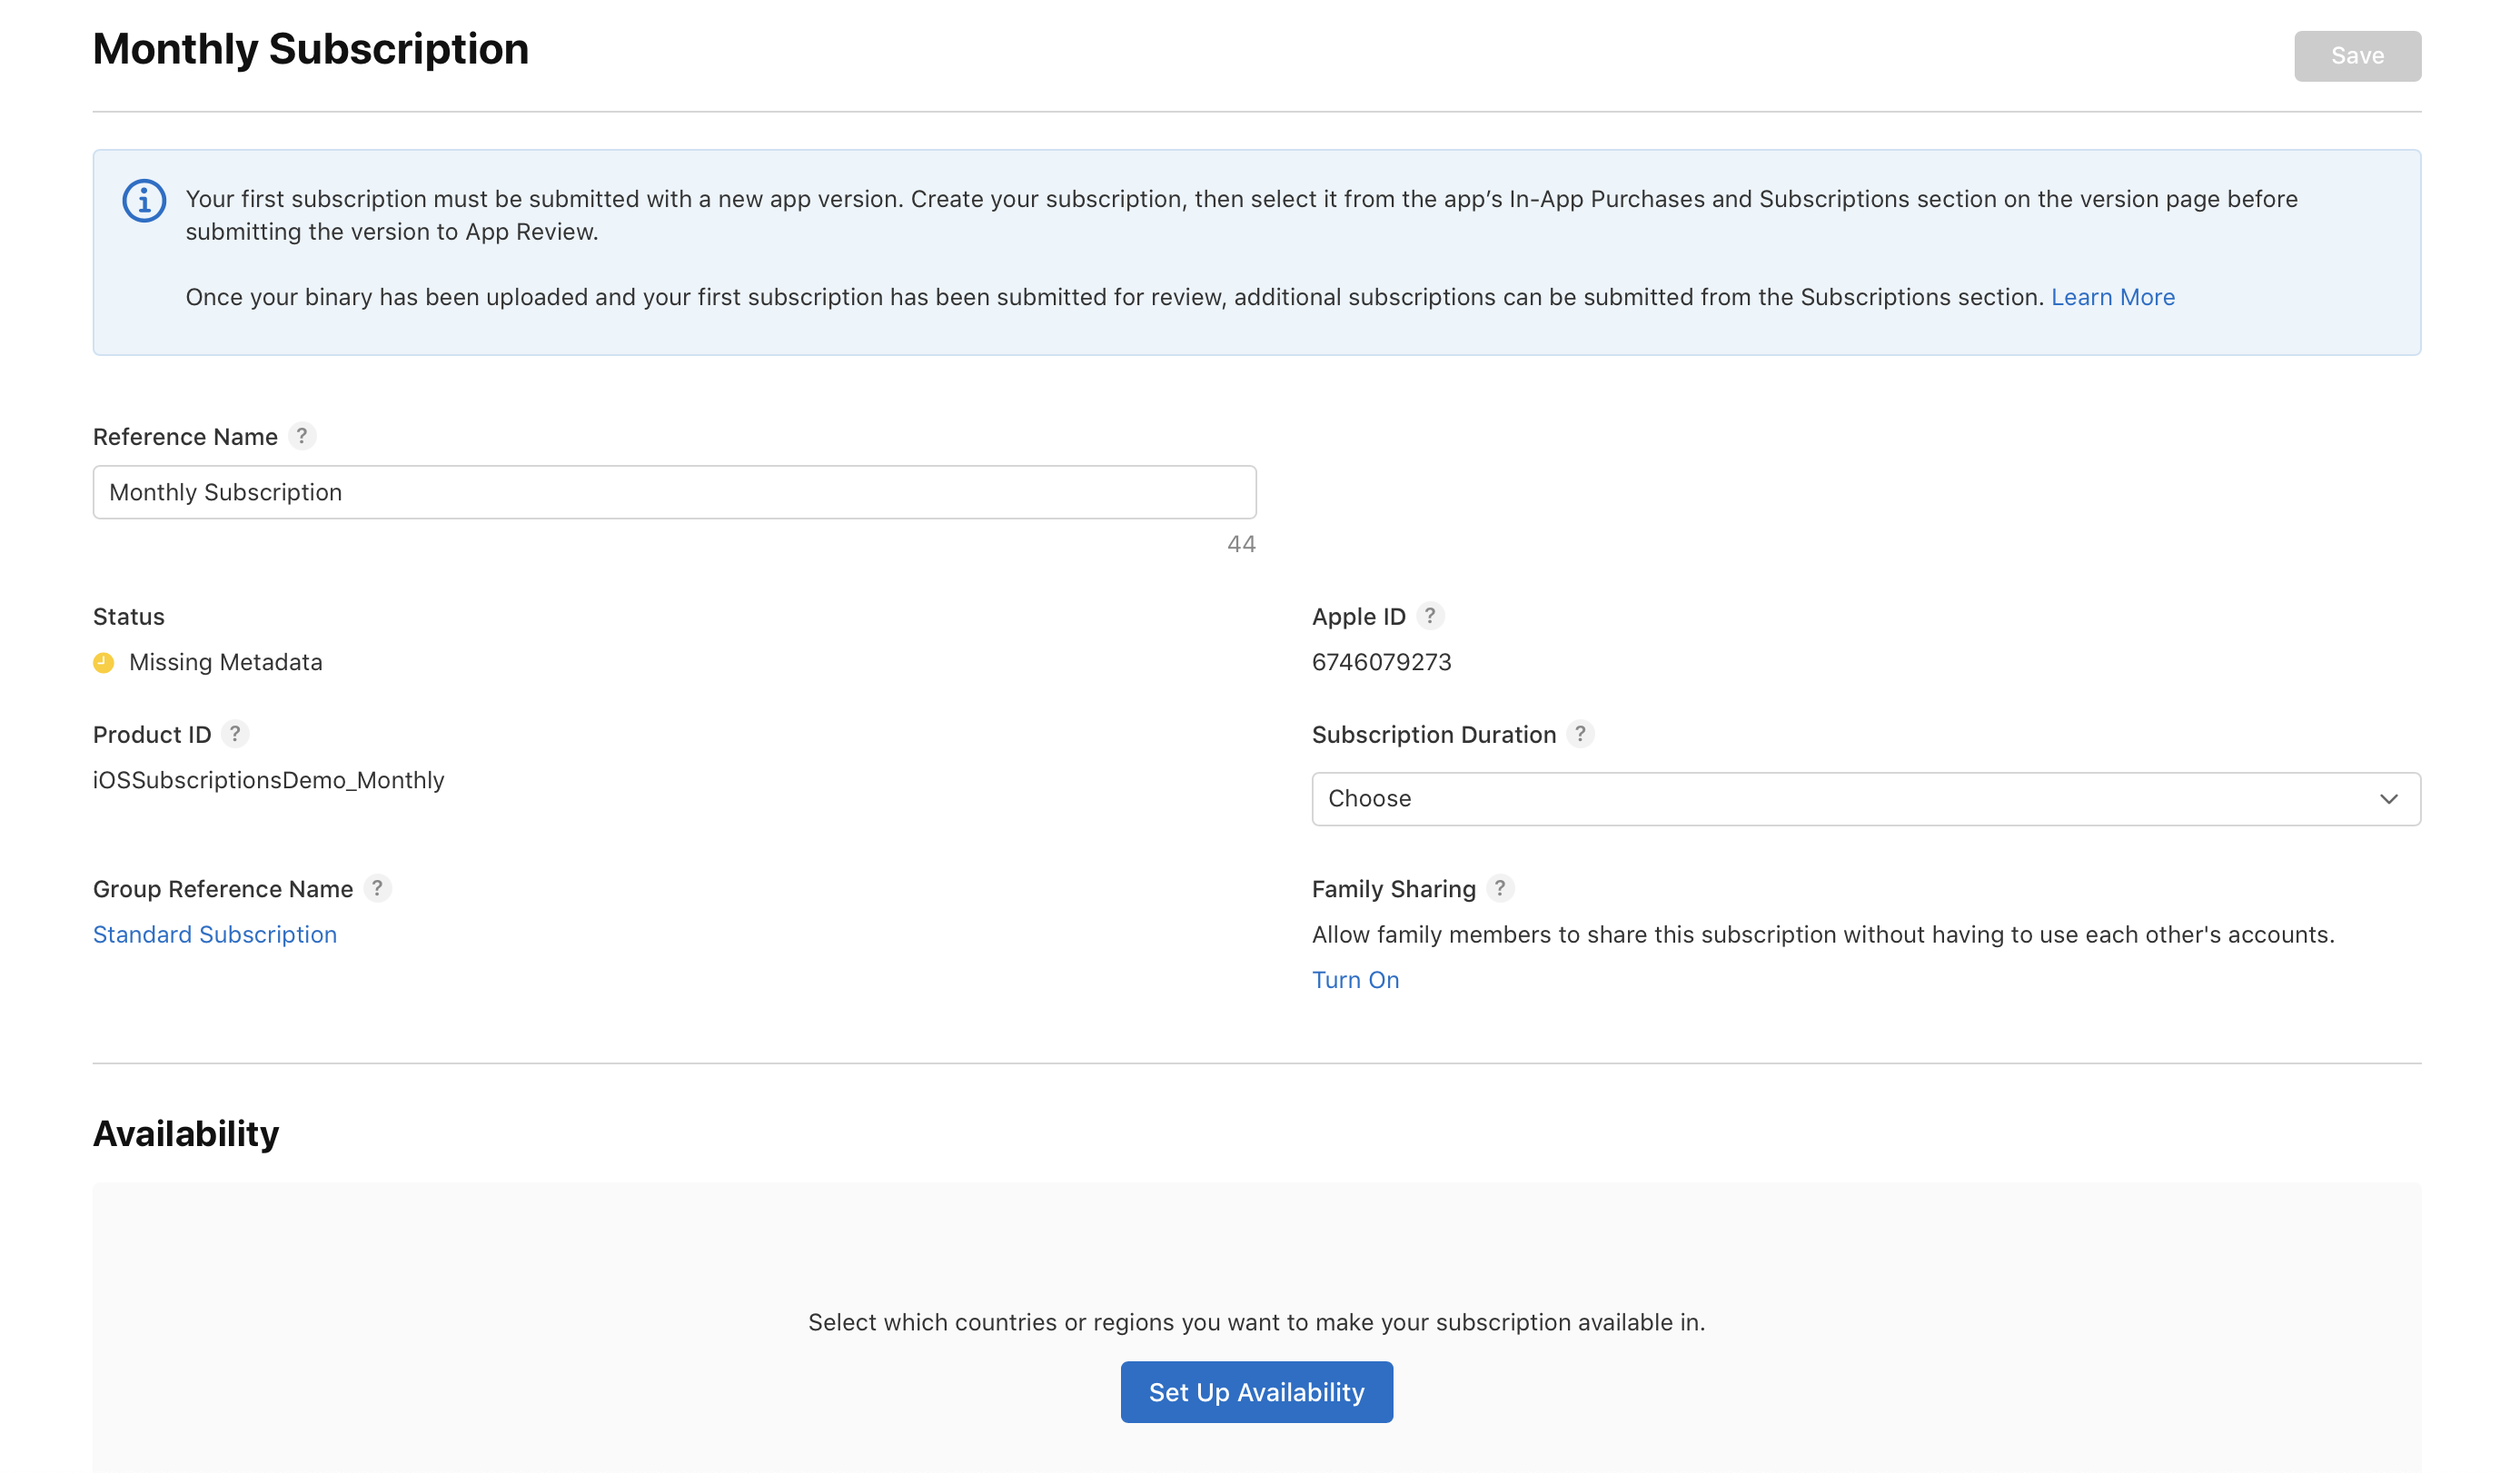
Image 5. Subscription metadata.
Add the App Store Localizations. This data needs to be added on the Subscription Metadata page as well as the Subscription Group page. The name and description you choose here will be visible to users.
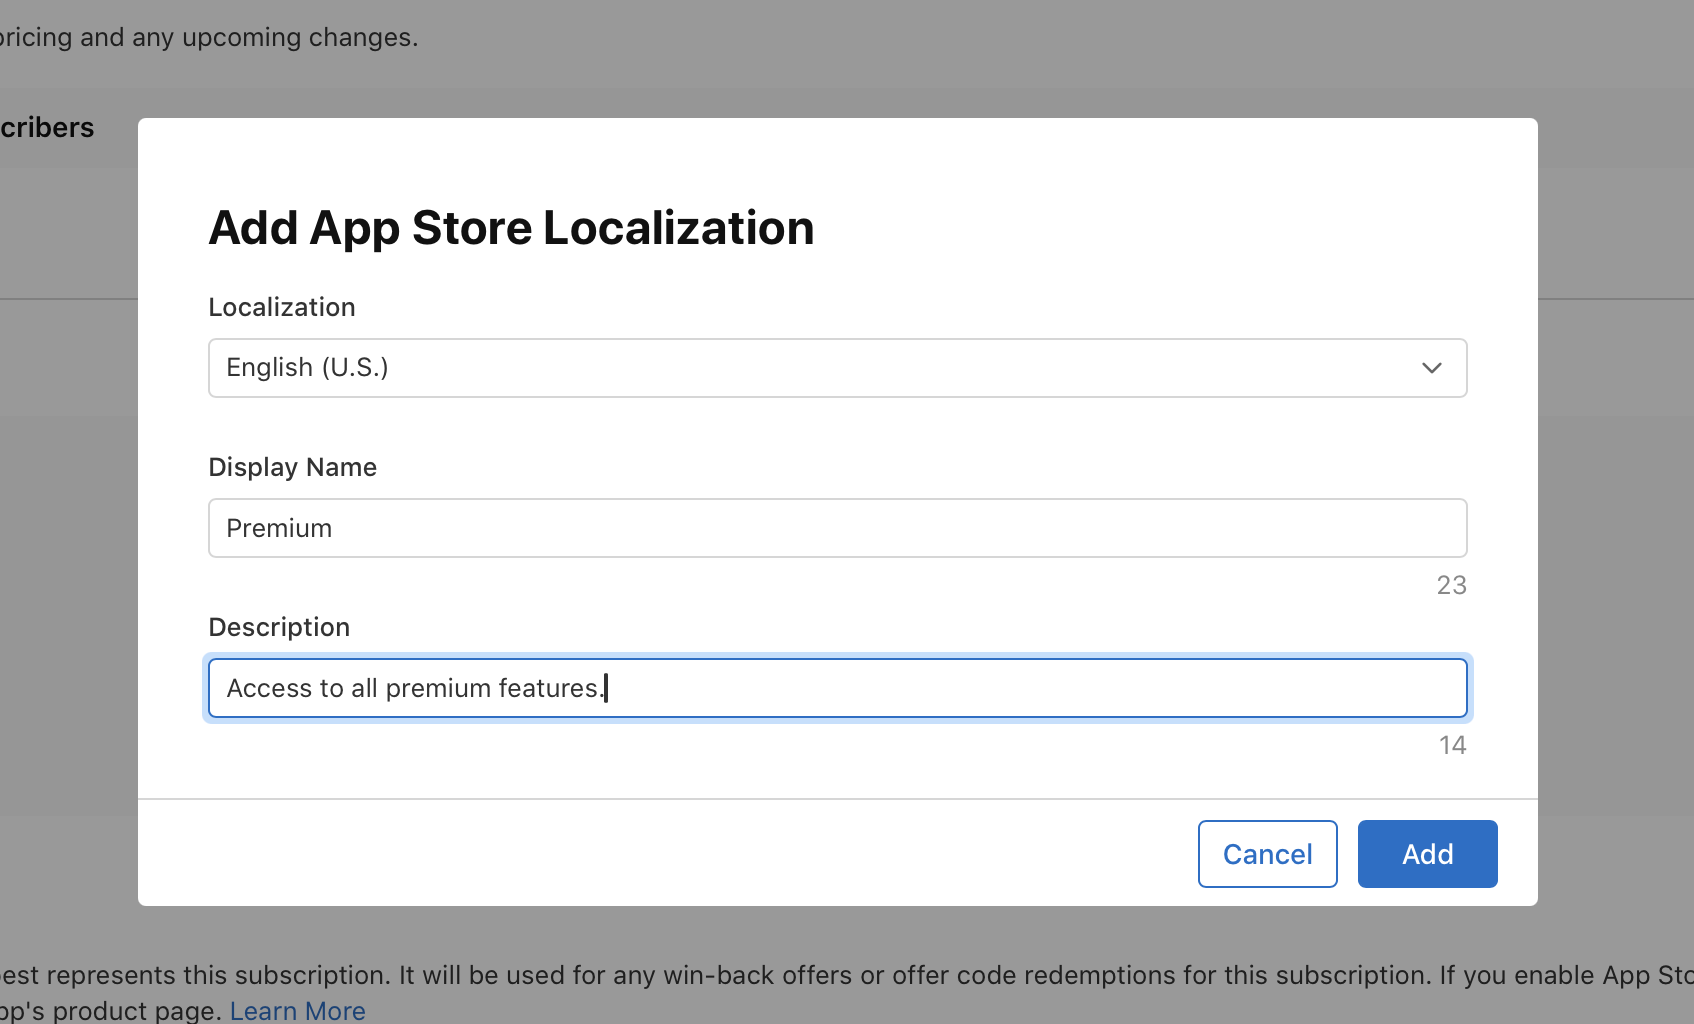
Image 6. App Store Localizations.
Keep adding the required metadata until you see "Ready to submit" status
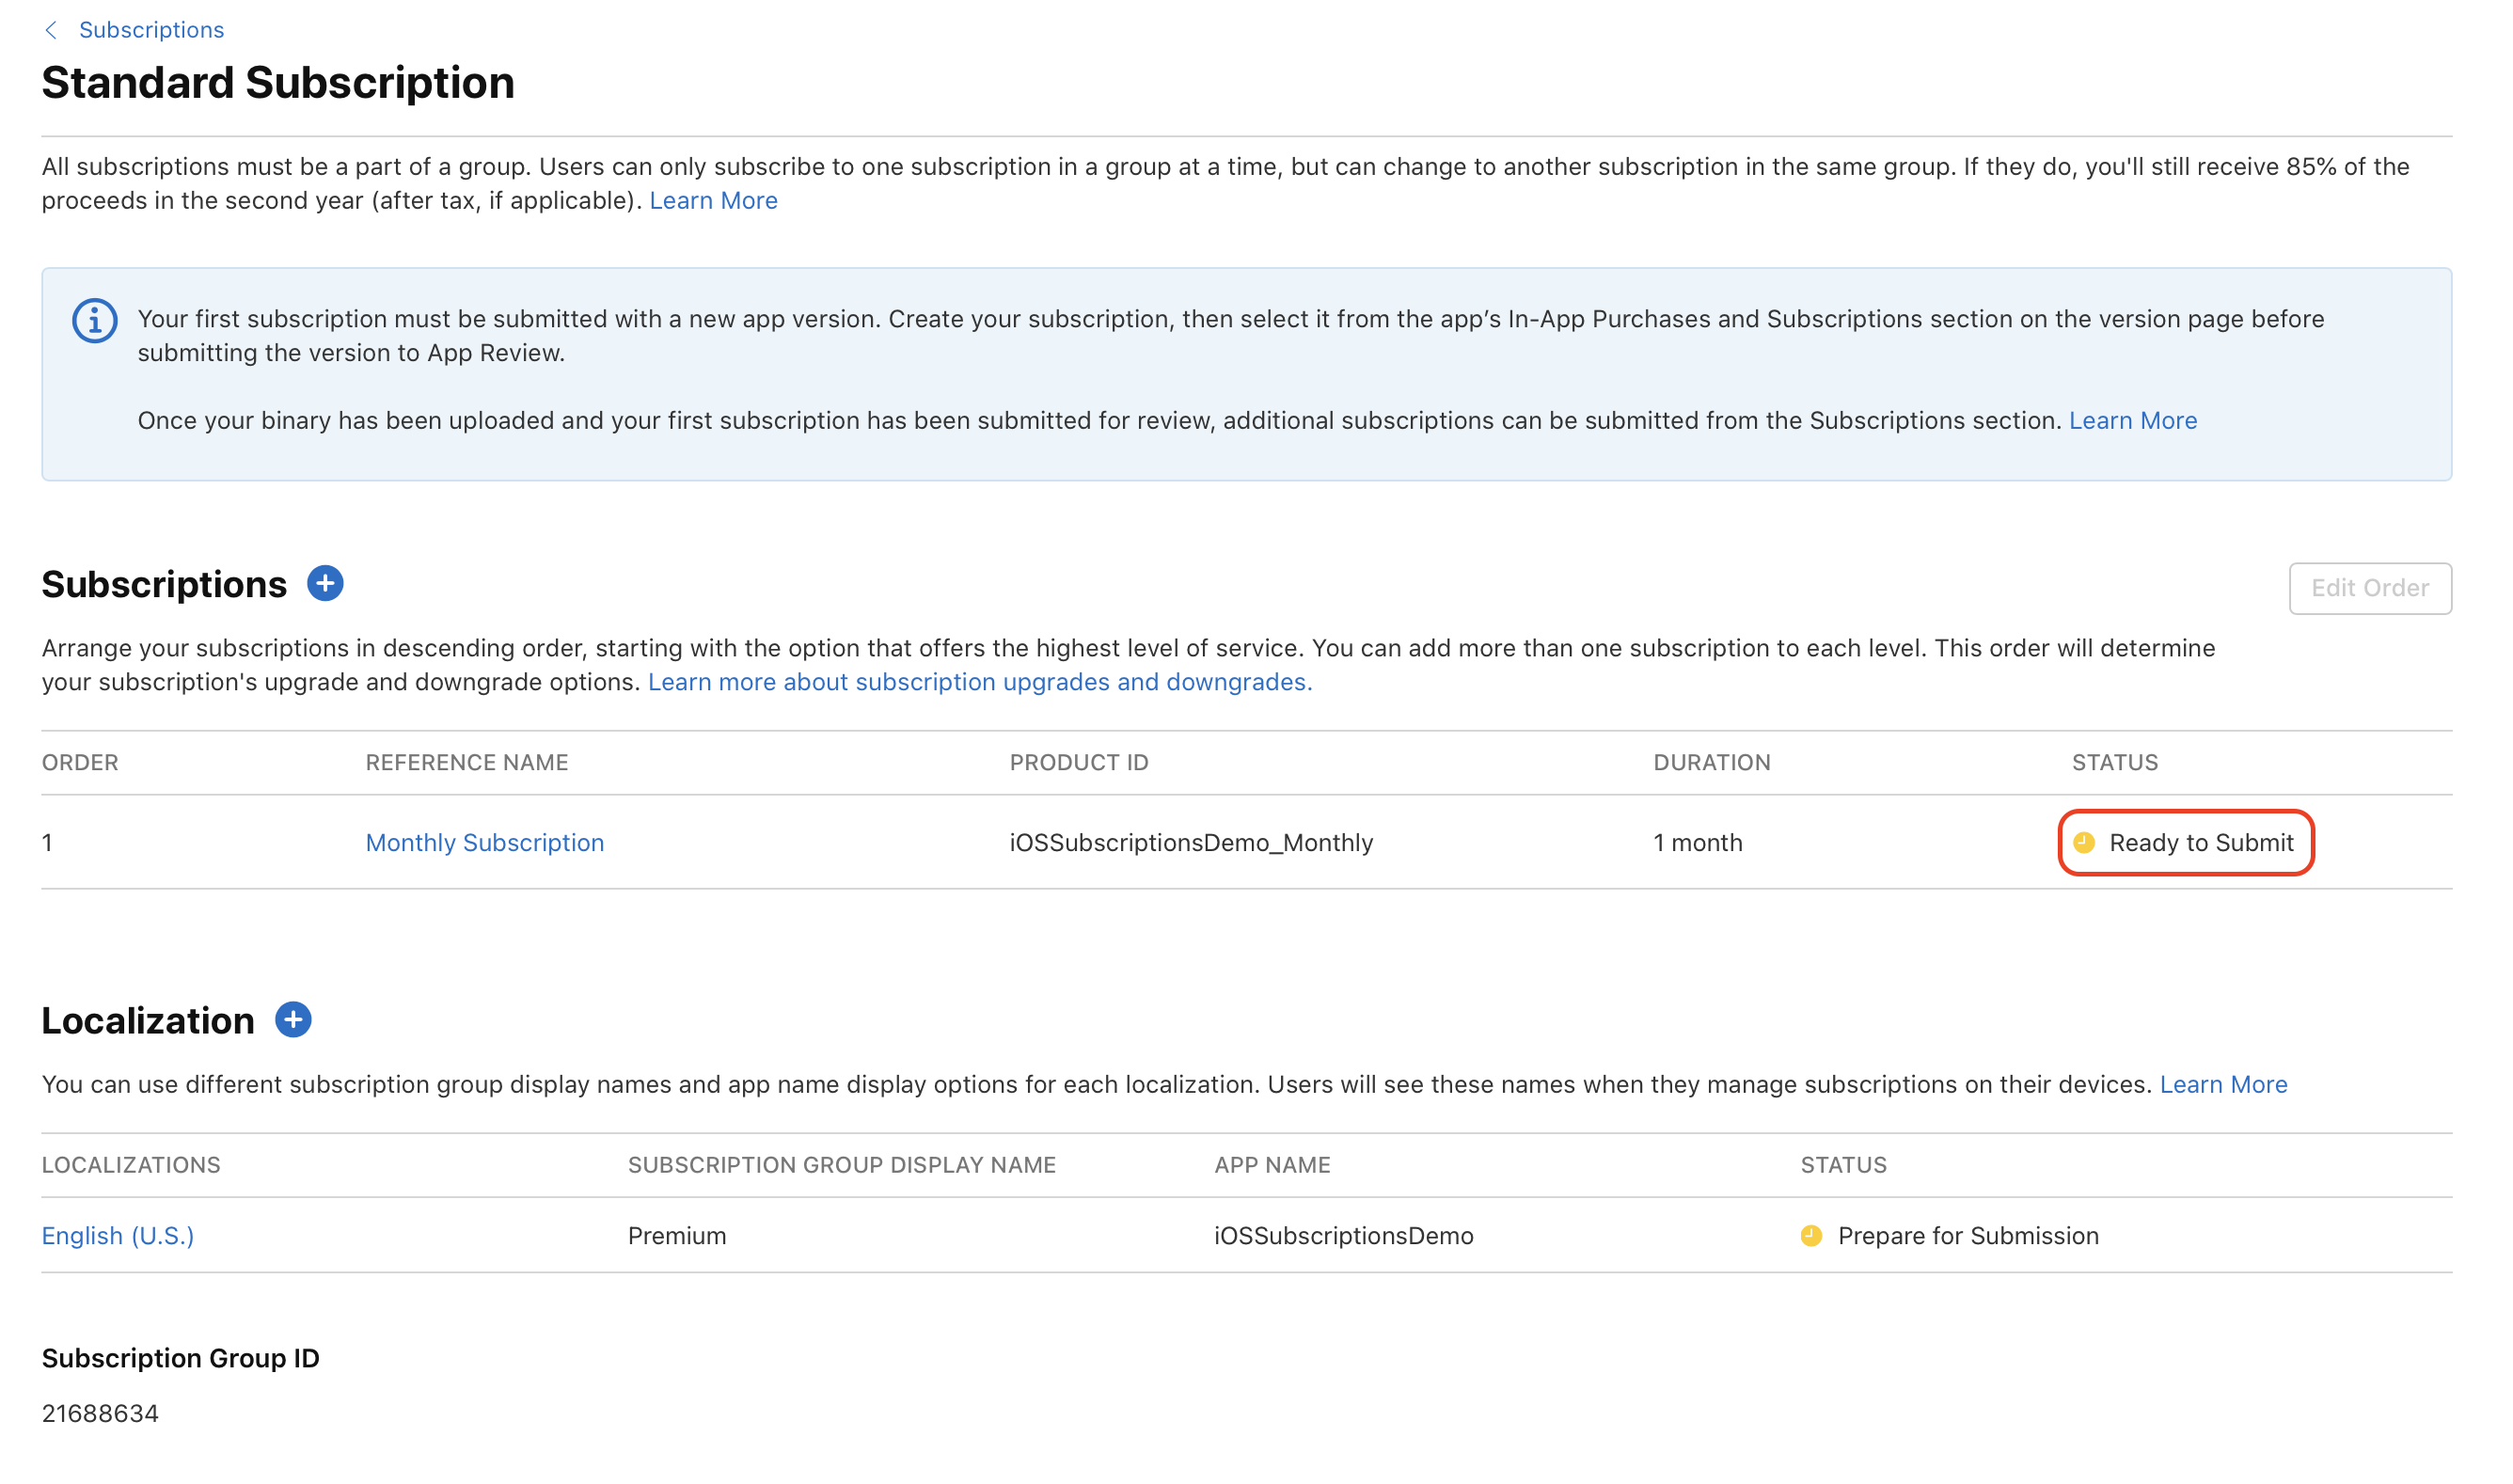
Image 7. Subscription status.
If you need to add an Introductory Offer, a Promotional Offer or Offer codes, you can do so by clicking the "+" icon next to "Subscription prices".
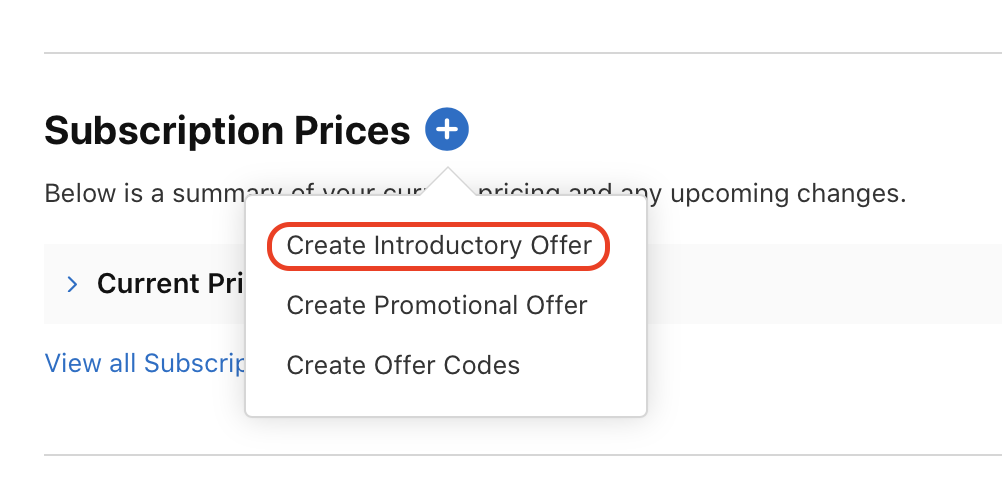
Image 8. Offers.
Once you configure all the offers you need, you'll be ready to use the created subscriptions in your app!
StoreKit Implementation
Implementation in this code example uses the current StoreKit API (StoreKit 2) available since iOS 15 onwards. If you need to support legacy StoreKit (below iOS 15) take a look at the StoreKit Documentation.
Before you start, first import StoreKit:
import StoreKit
The next step is to fetch the products/subscriptions we've just created in App Store Connect:
let productIDs: Set<String> = ["iOSSubscriptionsDemo_Monthly"]

func fetchProducts() async throws -> [Product] {
    let products = try await Product.products(for: productIDs)
    return products
}
This will get you the list of products/subscriptions created in App Store Connect and the Product object contains the metadata you can use and display to the user when promoting a subscription offer. Things like: name, description, prices etc. For more information and the complete Product object signature, checkout the StoreKit documentation.
Once the user selects a product/subscription they want to purchase, you will need to call the purchase method:
try await product.purchase()
This will start a purchase process. User will see the native popup confirming their choice and a Purchase button.
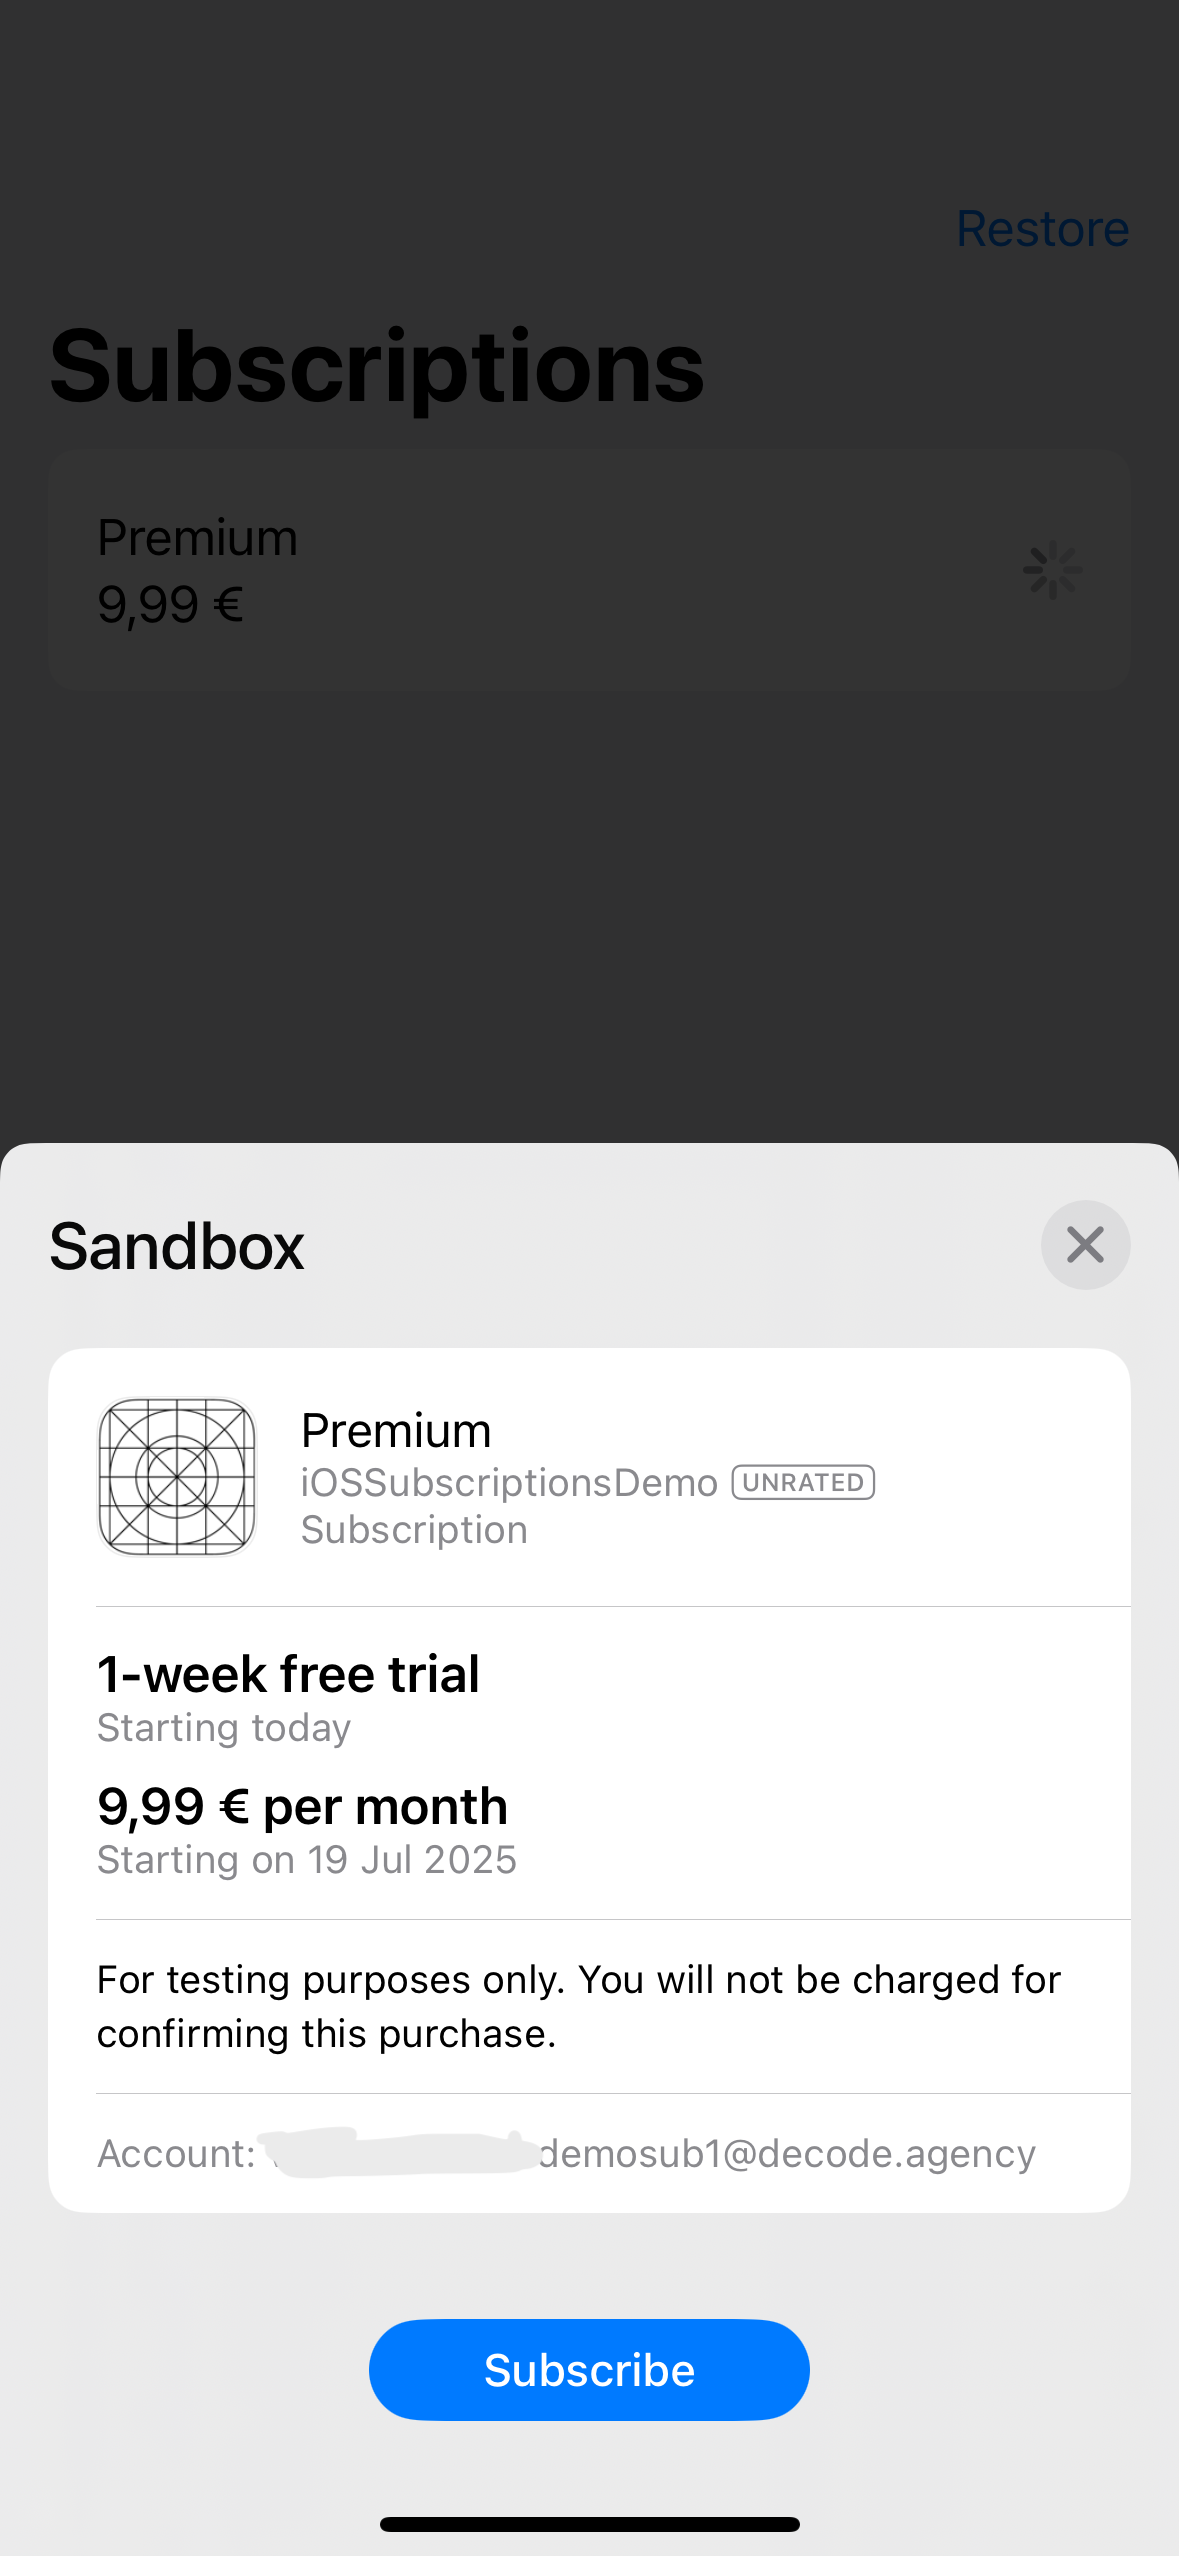
Image 9. Native popup.
The purchase method can take options parameter where you can include additional data such as promotional offer, app account token or even custom key-value pair and more. Checkout the StoreKit Documentation for more information and all possible options StoreKit gives you.
The purchase method returns a PurchaseResult which is an enum with these cases:
success-> which contains aVerificationResult<Transaction>(you'll use this later)userCancelled-> if the user decides not to go through with the purchasepending-> if the purchase requires action from the customer
Take a look at an example below:
do {
    let result = try await product.purchase()
    switch result {
    case .success(let verification):
        await handle(verification)
    case .userCancelled, .pending:
        purchaseState = .idle
    default:
        purchaseState = .idle
    }
} catch {
    purchaseState = .failed(errorMessage: error.localizedDescription)
    print("Purchase error: \(error.localizedDescription)")
}
You'll be able to handle errors in the catch block since the purchase method throws. If the purchase was successful, you'll need to handle the verification next.
StoreKit will verify your transactions automatically and the VerificationResult<Transaction> will contain the Transaction object if the transaction is successfully verified. You'll be able to use this Transaction object to inspect its data, finish the transaction or even begin a refund request for the user. If the transaction is not successfully verified, the VerificationResult<Transaction> has the unverified case containing an error. See the handle method example we made below. For context, purchaseState is our custom state:
@MainActor
private func handle(_ verification: StoreKit.VerificationResult<StoreKit.Transaction>) async {
    switch verification {
    case .verified(let transaction):
        await transaction.finish()
        purchaseState = .purchased(productID: transaction.productID)
        print("Finished transaction for \(transaction.productID)")
    case .unverified(_, let error):
        purchaseState = .failed(errorMessage: error.localizedDescription)
        print("Transaction unverified: \(error.localizedDescription)")
    }
}
Sometimes you'll want to verify this purchase yourself either on device or on a server for additional security. This type of verification is outside the scope of this guide. However, this StoreKit documentation page contains the information you need to coordinate such verification.
StoreKit offers a listener for purchases if your usecase depends on it. This is useful for when users complete a purchase on another device (iPad or Mac) or for when your users want to enable Ask To Buy for a child account. Here's a simple example:
init() {
    listenForTransactions()
}

private func listenForTransactions() {
    Task(priority: .background) { [weak self] in
        for await verification in Transaction.updates {
            await self?.handle(verification)
        }
    }
}
This will execute when a transaction happens on another device if the app is running. If transaction happened while the app wasn't running, queued transactions will be handled at app startup only once. Make sure to start this task at app launch to not miss those transactions.
If a user changes their device while having previously subscribed and with a still valid subscription, you need to offer a Restore Purchases functionality. Make a visible button (usually somewhere on the Subscriptions Offer screen) and run this when the button is pressed:
func restorePurchases() async {
    for await verification in Transaction.currentEntitlements {
        await handle(verification)
    }
}
Transaction.currentEntitlements will emit the latest transaction for each product/subscription the user has an entitlement to. You can use this to check if the user has previously purchased any of your valid subscriptions and activate them accordingly.
Testing
Before testing, make sure you create a Sandbox account by going to App Store Connect -> Users and Access -> Sandbox
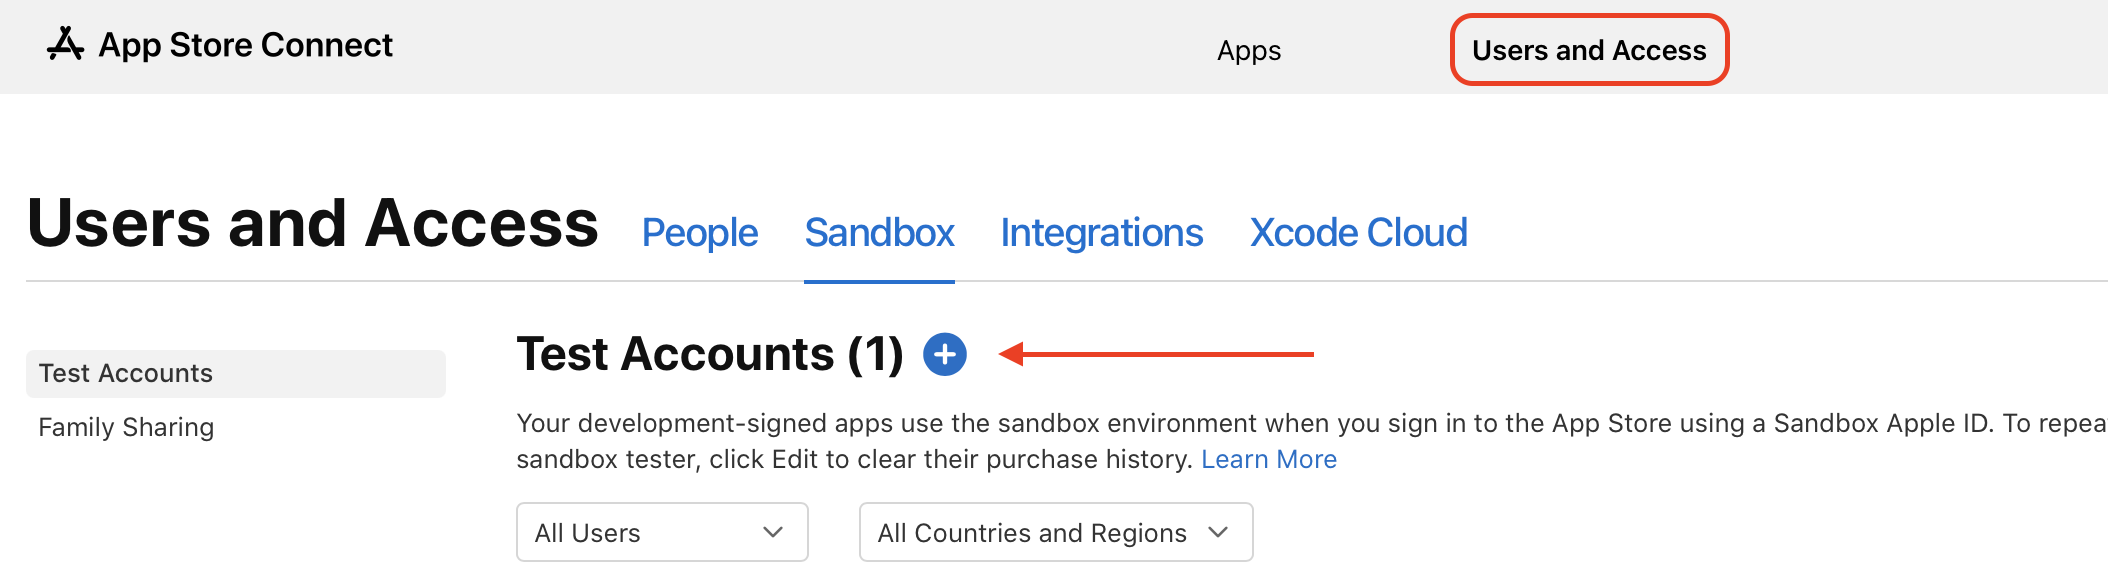
Image 10. Sandbox Account.
There are three main ways we can test iOS Subscriptions.
- StoreKit Configuration File (Xcode)
In your project, go to File -> New file from template and search for StoreKit Configuration File. Create your config file and you will see this:
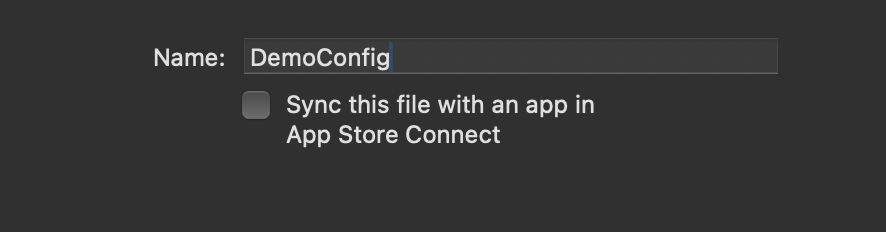
Image 11. Configuration file.
Name your configuration file and optionally you can choose whether to sync your exact settings from App Store Connect or you want to create your own settings. Choose to sync if you want to test the exact subcriptions you already set up. The configuration file will allow you to create possible scenarios durig a purchase process so you can test your app behavior. Things like interuptions, billing errors, retries, change renewal rate etc.
To make this configuration file active and working on your app, edit the scheme you're running to include the file as seen in the image below:
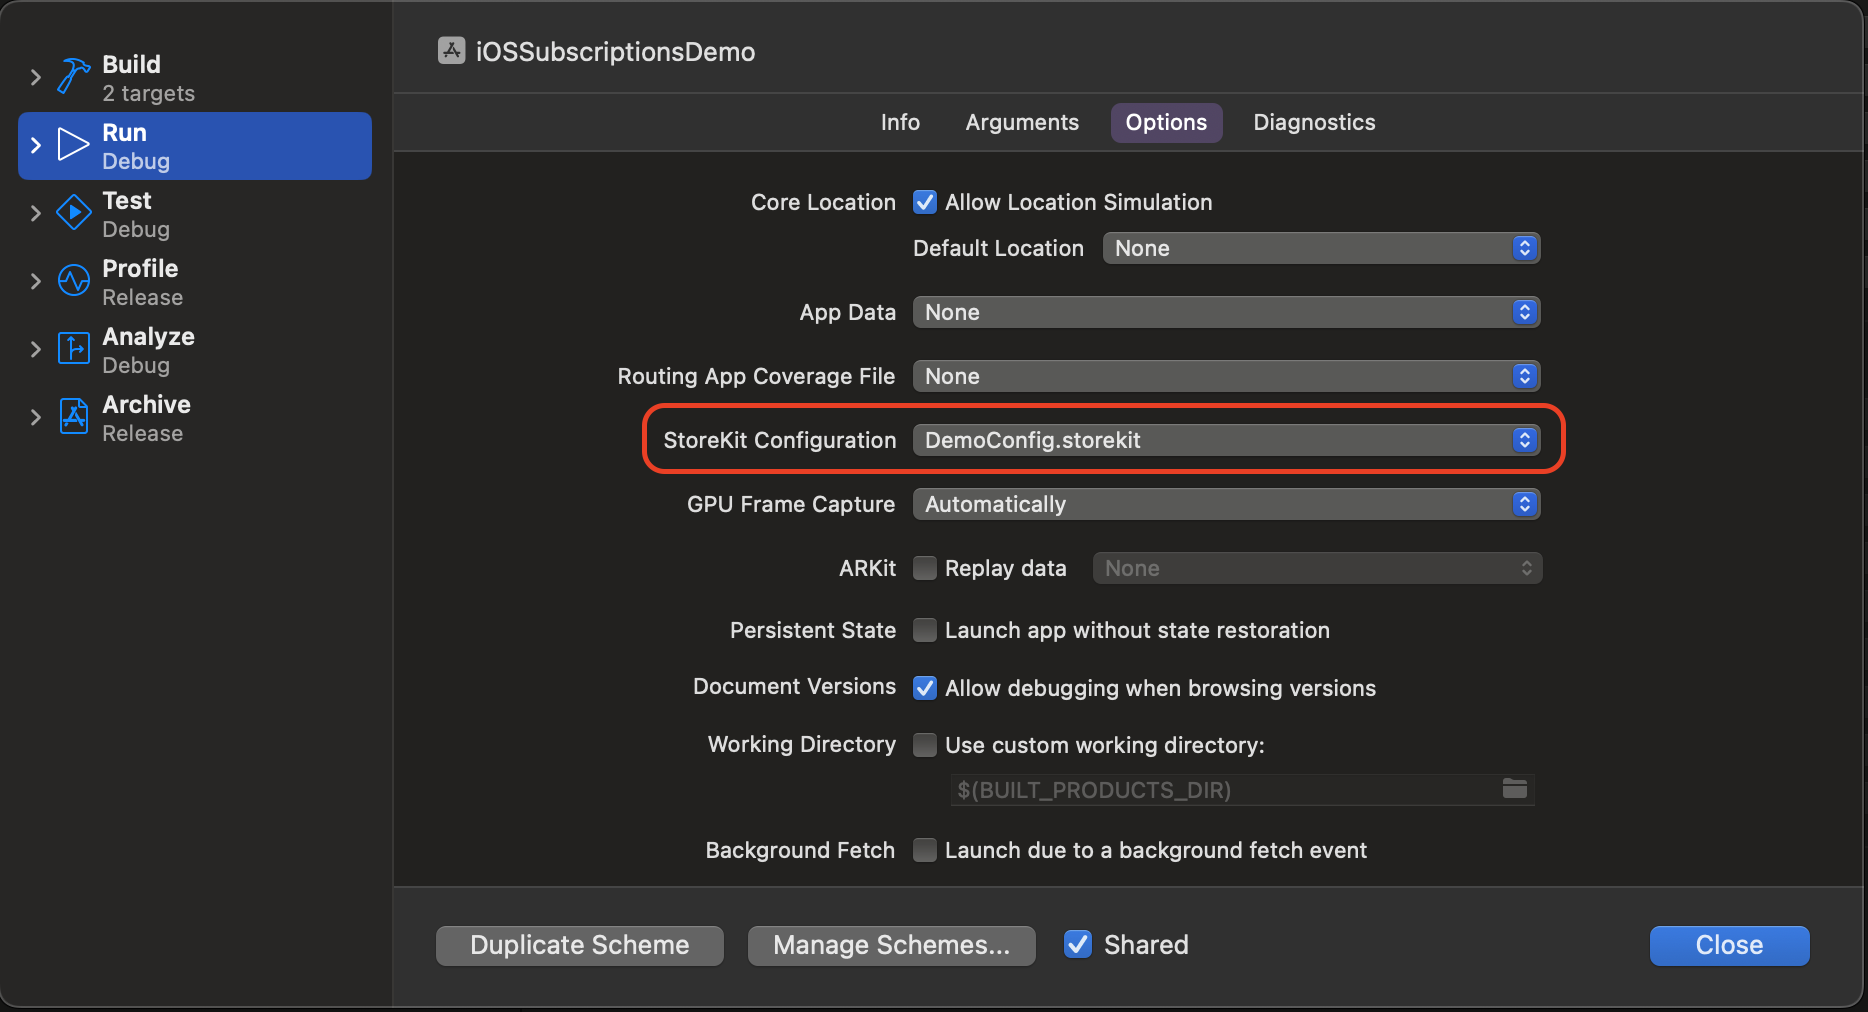
Image 12. Configuration file.
- Sandbox Testing
If you don't use the XCode configuration file, you can run the app on a real device and log in to your sandbox account for testing. You would want to do this if you're doing serverside validation for your purchases since Xcode configuration file is doing the work only locally. Apple servers are not contacted so your transaction IDs are only placeholders. With this method, you will get proper values for testing.
Enable Developer mode on your iOS device, go to Settings -> Developer -> Sandbox Apple Account
Log in to your previously created sandbox account and it will be used for testing purchases in your apps run in debug mode on that device.
- TestFlight
When you need to test with a larger group of people, use TestFlight. Deploying your app on TestFlight will keep the purchases in the Sandbox and real money will not be exchanged. All your App Store Connect settings, subscriptions and offers will apply.
Deployment
When creating your first subscription, the only way for it to be reviewed by Apple is if it's supplied with a new build in App Store Connect. It will be reviewed along with your app and if approved, it will be deployed to your users.
Subsequent subscriptions can be added for review individually in the Subscriptions section of App Store Connect.